 Azure Blob Storage Support
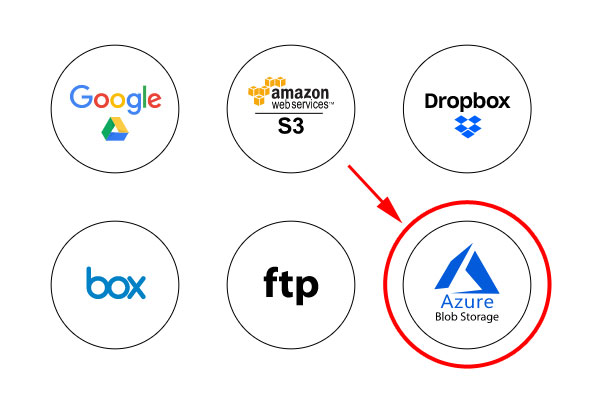
I am excited to announce Azure Blob Storage Support for RingClone! Archiving your calls, messages, texts, and faxes with Azure Blob Storage is a quick and easy! All the features you are familiar with (such as file name templates, instant sub-folders, automatic user/date/ext/caller categorization) are now available with your Azure Blob Storage account. In addition, Azure Blob Storage provides extra security features and data organization tools for your data. These features, such as scoped SAS URI’s, access policies, and “one container per user” can be incorporated into your data storage scheme within RingClone. Within RingClone, we provide two protocols by which data can be stored to your Azure Blob Storage:
- Storage account access: RingClone has full access to every container within the designated storage account. RingClone also has the ability to create containers. A common use case for this level is to give RingClone a designated storage account for all data, and then set up the RingClone config to create a separate container for each user in your organization, with further sub-folders underneath each container.
- Container access: RingClone has access to a specific container within your Azure storage. RingClone only has the ability to create subfolders and files based on your subfolder rules. One benefit of this protocol is that you can apply a custom access policy (created within Azure Storage Explorer) to the SAS URI that RingClone uses. A common use case for this level is to use a shared storage resource in your Azure account, and set up RingClone to create sub-folders for data storage within that shared resource.
If you are setting up RingClone for the first time (and want to use Azure Blob Storage), follow these simple steps:
- Click “Archives” at the top.
-
You will see a list of storage destination options (including Azure Blob Storage). Click the option for “Azure Blob Storage”.
-
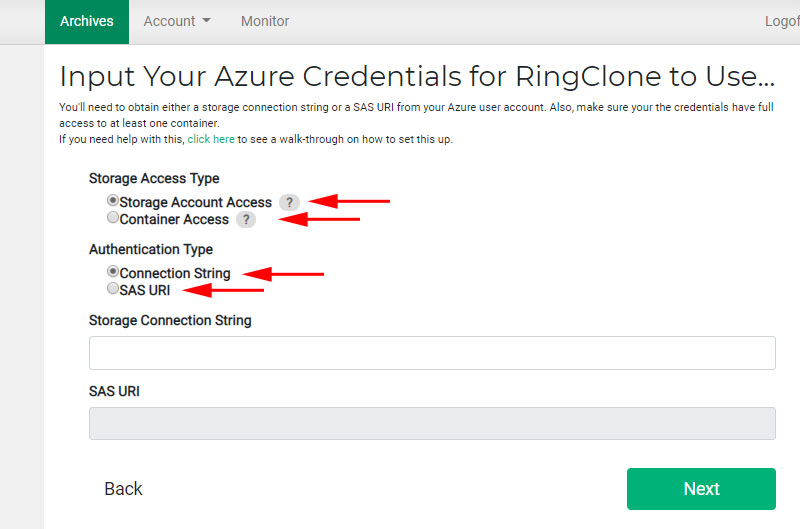
Enter appropriate credentials to give RingClone permission to archive files to your Azure Blob Storage account. Either select “Storage Account Access” or “Container Access”.
-
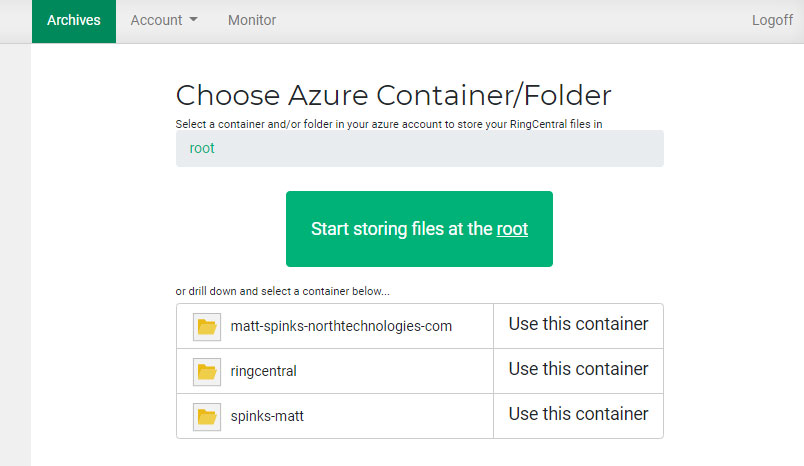
Select a container and/or folder for RingClone to use as a starting point.
-
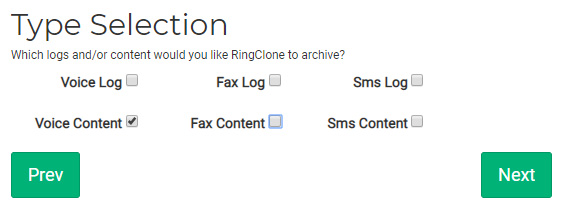
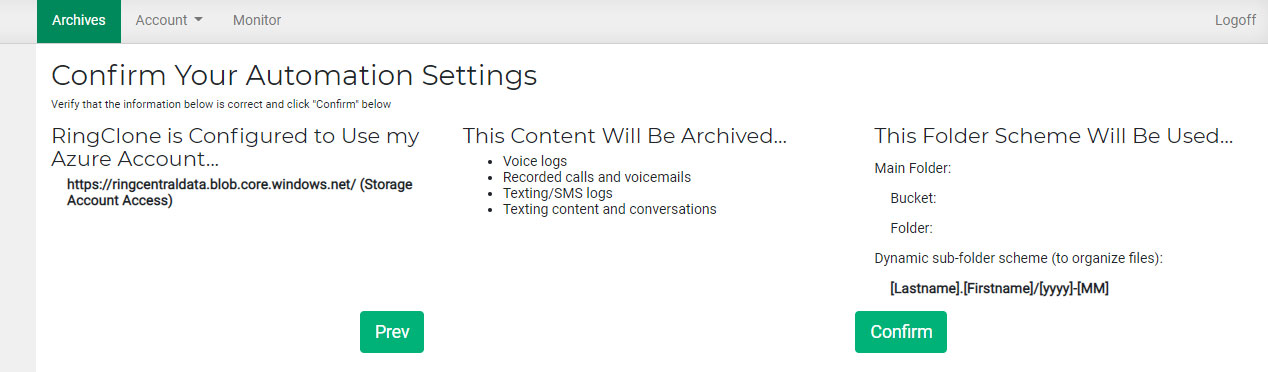
Select the types of data for RingClone to archive (or to use for QA).
-
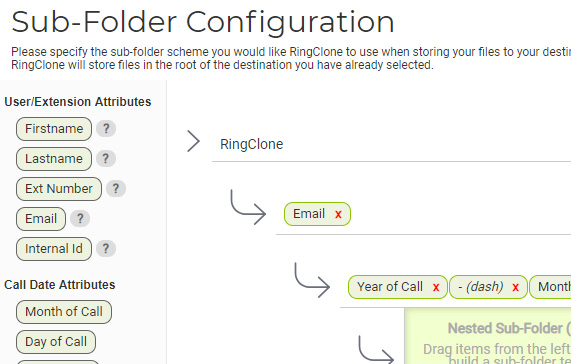
Create your sub-folder and file templates with the easy-to-use drag/drop interface.
-
Click “Confirm”.
If you already have archiving set up with RingClone, and would like to change your destination to Azure Blob Storage, follow these simple steps:
-
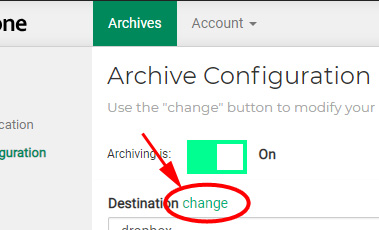
Under “Archives” -> “Configuration”, next to the “Destination” title, click “change”.
-
You will now see a new option for “Azure Blob Storage”. Click that.
-
Enter appropriate credentials to give RingClone permission to archive files to your Azure Blob Storage account. Either select “Storage Account Access” or “Container Access”.
-
Select a container and/or folder for RingClone to use as a starting point.